Merry Christmas!

It’s about 2:30 AM Christmas morning and I am wide awake after a few hours sleep. From the time I was a little girl I have always been excited on Christmas  morning. Nothing has changed. And even though the family isn’t coming over until later, here I am awake and excited. Maybe I heard Santa on the roof. (smile)

I made and sent out several different Christmas cards this year but my absolute favorite was using the set Christmas in the Making. November and December are so full of stamp classes that I find myself exhausted with all of the time involved so when I made these cards, not for any class, but just for me, I truly had the best time. I have to keep one set for my own use so that I have a card I can send to friends who don’t come to any of my classes. This is the set I chose.

This card used some retired DSP which I coordinated with the dress by stamping the bottom part on the paper and then fussy cutting it out and layering over the stamped image.

I think the color combination on this card makes it look even more retro. She has Dazzling Diamonds Glitter on her collar, sleeves, and the top of her boots.

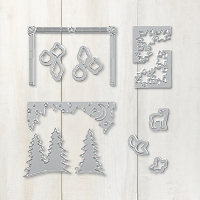
I used the new Stampin’ Blends to color with. I love them! Such an easy way to color. I outlined the images with the light Smokey Slate Blends marker to give depth to the stamped image. The framelit used on this card is retired however there are several others that would work or you could just cut the paper with straight sides like the one above.

~~~~~~~~~~~~~~~~~~~~~~~~~~~~~~~~~~~~~~~~~~~~~~~~~~~~~~

Yesterday there were two Christmas services at the church I attend, St. Andrew Methodist. The morning service was a birthday party celebration with a nativity story for the children which ended with what looked like half of the congregation up front playing the parts of Mary, Joseph, wise men, angels, shepherds, sheep, and more. It was wonderfully told and great fun. And my friend, Donna, and I did the reading and lighting of the Advent candles. The evening service was a traditional candlelight service with lots of the old Christmas hymns.

Over the years I have acquired several Nativity sets, each with it’s own memories.

This is the one I grew up with which makes it about 75 years old. No, I’m not that old yet but I believe my parents got it before I was born. Many of the pieces are chipped and the stable is literally falling apart. I imagine that first stable where Jesus was born might have also been old and beaten down. Some of the figures have prices written in pencil on the bottom, most of them being about 15 cents.

This is the first Nativity I bought in 1966 making it 51 years old.

This Hummel Nativity belonged to my parents and sits on my mantel.

And a few more . . .

Jesus IS the reason we celebrate Christmas. My wish for you is a day filled with the love of family and friends and a very happy Christmas.

Merry Christmas,

Beth


White Glimmer Tree Christmas Card

This Christmas card is one from my classes using the Carols of Christmas stamp set and Card Front Builder Thinlits Dies. I love the green and black color combination inspired from several projects in the Holiday Catalog. Stampin’ Up is so on trend. When I was in Target the other day I noticed a whole line of Christmas products from the new line by Chip and Joanna Gains (Fixer Upper, HGTV) in black and green.

I also fell in love with the Merry Music Specialty DSP and used it on a lot of cards and projects this season.

I used the thick white card stock for the base of the card and the regular white cardstock for the rest of the card. The thicker cardstock just gives a nicer finished card I think. I also used glue dots to adhere the black music paper to the strips of white glimmer paper on each side. I find it the easiest way to get things to stick to the glimmer paper.

And the inside:

Joy, Joy, Joy!

 This is the season of Peace, Joy and Love! I love everything about Christmas, always have. This was a fun and easy card to make using the Eclipse technique.

I often wonder about new techniques and how they start. Seems once you see one they are showing up everywhere. You need the large letter framelit dies for this and 3 letter words are perfect although I have seen some with 4 letters.

For this card I used Holly Berry Happiness stamp set, Holly Berry Builder Punch, Holly embossing folder, and the Large Letter Framelits.

  • Stamp the holly and berries on the white card stock. It is much easier to line up if you stamp the outline stamp first and then the solid image. When stamping and Eclipse card I like to leave white space so the popped up letters stand out better.
  • Die cut the letters.
  • Emboss all white and stamped pieces.
  • Attach white card stock to Garden Green card base.
  • Use Foam Adhesive Strips on the back of the letters and attach to card.
  • Use Multipurpose glue on the back of the center of the “O” and press down inside the “O”
  • Stamp and punch out the bow and attach to the “Y”.
  • Add a red colored rhinestone to the bow (colored with the red Blends marker)
  • I did add Wink of Stella to the holly, berries, and bow. I love sparkle!

And the inside:

By the way, I did get the trees (yes, there are 2 of them) decorated. I put a new one on my back sun room because I still love the old colored lights and especially bubble lights. Since I still have some of those I decided to do an old fashioned tree. What was nice about doing this tree is that I could reach the top. It is only 5 feet tall.
 
 
This tree requires the BIG ladder. It is 9-1/2′ tall.

Little Drummer Boy

Doesn’t this just make you think of the song! It’s one of those that keeps playing in your head after you think of it. Pa rum pa pum pum ….  Here’s an interesting tidbit. I looked the song up online and found out that it was written in 1941 and first recorded in 1951 by the Trapp Family Singers. It’s been recorded by many, many artists since.

And the inside:

Stamparatus Reservation UPDATE

From Stampin’ Up:  The first Stamparatus reservation window reached its maximum number of reservations in just 15 minutes, which provided us with some very important information: You LOVE this new stamping tool! We couldn’t be more thrilled; in fact, your response was so amazing that we’ve decided to make some important adjustments to the reservation process.

As was previously announced, the second reservation window will remain open from December 5–30; however, during this reservation period we will take as many orders as we receive (yay!) and not close the window until December 30. So whether the total number of reservations is 100 or 100,000, the window will stay open!

Please note the following changes:

Beginning March 19, we will ship Stamparatuses in the order the reservations were received (first in, first out) and continue through the next few months and beyond as product arrives in our warehouse. Because shipment dates are based on manufacturing lead times, not all of the reservations made during the December 5–30 window will ship on March 19 (as was previously announced).
In order to accommodate demand, limits have changed as follows: one reservation per customer and one per demonstrator.
Because we are not limiting the maximum number of reservations for the second window, we will not offer a third window. This is the last chance for you to reserve a Stamparatus before it becomes available in the 2018-2019 annual catalog.

The reservation window will open at 2:00 PM (MT) on December 5.
Remember that you will need to secure your reservation with a credit card however your card will NOT BE CHARGED until it actually ships.


FREE Shipping – Monday, December 11th

Stampin’ UP!  announced there will be FREE SHIPPING for one day only, Monday, December 11th. I need a few things before January and was planning on putting in another order so I’m taking advantage of this tomorrow. If you would like to order anything you can order online or just let me know by 6PM Monday and I will order for you. Don’t forget to check the Year End Extravaganza deals and the Clearance rack too.

Eskimo Treat

This adorable Eskimo treat bag is filled with chocolates. It’s the perfect size to slip a gift card into. The Eskimo is from the Cookie Cutter Christmas stamp set which coordinates with the Cookie Cutter Builder Punch. I used markers to color the Eskimo. The cello bag is the 3″x6″ gusseted bag. The DSP, snowflake punch, and Baker’s Twine are retired products but easily can be substituted with other products as could some of the other stamped images from this stamp set.

The DSP is cut 12″ x 2-7/8″ and scored at 5-1/4″ and 7-1/4″ and then slipped into the opened bag. This will give you one side that is a bit longer which I finger folded over the top edge of the bag, attached the strip of white Glimmer paper with glue dots and secured the top with a clothespin. The strips for the candy wrappers are 1″ x 3″ which I wrapped around the Hershey nugget and secured with Tear & Tape. I used Wink of Stella on the fur parts of the Eskimo jacket.

My goal this week was to get the Christmas tree decorated however there it stands with only the lights and tree top. That leaves me with tomorrow if I’m to get it done this week. So much to do …. so little time. I  hope you are not as behind as I seem to be. But I’m kind of a last minute “get er done” kind of gal so I’m not too worried that there’s only a little over two weeks left until Christmas.  How about you? Are you ready?

Thanks for stopping by

Hot Cocoa Treat

I always do 3 different treats in the Tags, Bags, and Treats class. This one is a packet of Ghirardelli cocoa, one of the treat tubes from the Holiday catalog filled with the mini marshmallow bits, and a candy cane. The ribbon is retired however you can use any coordinating ribbon.

I had been planning on making this for some time however procrastinated in getting the marshmallows and then a week before the class couldn’t find them in three different stores. So I tried ordering them online but couldn’t get them in time for the class. I went to one last store with my daughter and she found them! I was so relieved and excited to get them. They were on the aisle with the hot chocolate. I had been looking for them where the marshmallows are.

Mitten Christmas Bag

Here’s another Christmas Bag from my Tags, Bags, and Treats Class. I was inspired by a bag given to me last year by my friend Linda. I knew right then it would be in this years class. I drew a pattern for the mitten and the mitten top, cut them out and embossed them. I also drew a pattern for the holly leaves, added some drawn in veins with a marker and added punched berries. Silver ribbon and sequins make it festive and the mitten paper from the Be Merry Designer Series Papers was the perfect piece to make the tag.

Have a great weekend.

Christmas Bag

Every year I hold a Tags, Bags, & Treats class where people come and make a couple of bags, some holiday treats, and Christmas gift tags. This is one of the bags we made.


It is really quit easy to make from just one sheet of Designer Series Paper. For this bag I used the Year of Cheer Specialty DSP.

To make this bag:

  • Score one side at 3-1/2″, 5-3/4″, 9-1/4″ and 11-1/2″
  • Turn the paper 1/4 turn so the 1/2″ scored line is at the bottom.  Score at 2-1/4″
  • Cut out the small 1/2″ piece and cut in indicated lines.
  • From the back side place Tear & Tape where indicated.
  • From the front side place Tear & tape where indicated.
  • Fold sides together.
  • Fold flaps at bottom together.

The banner pieces are 1′ x 6″ and 2″ x 5″

  • Open up the wreath to make it single layer and larger. Attach to bag with glue dots.
  • I used retired red foil paper on this. I so wish Stampin’ Up would bring it back.